-
Custom Wooden Fight Stick
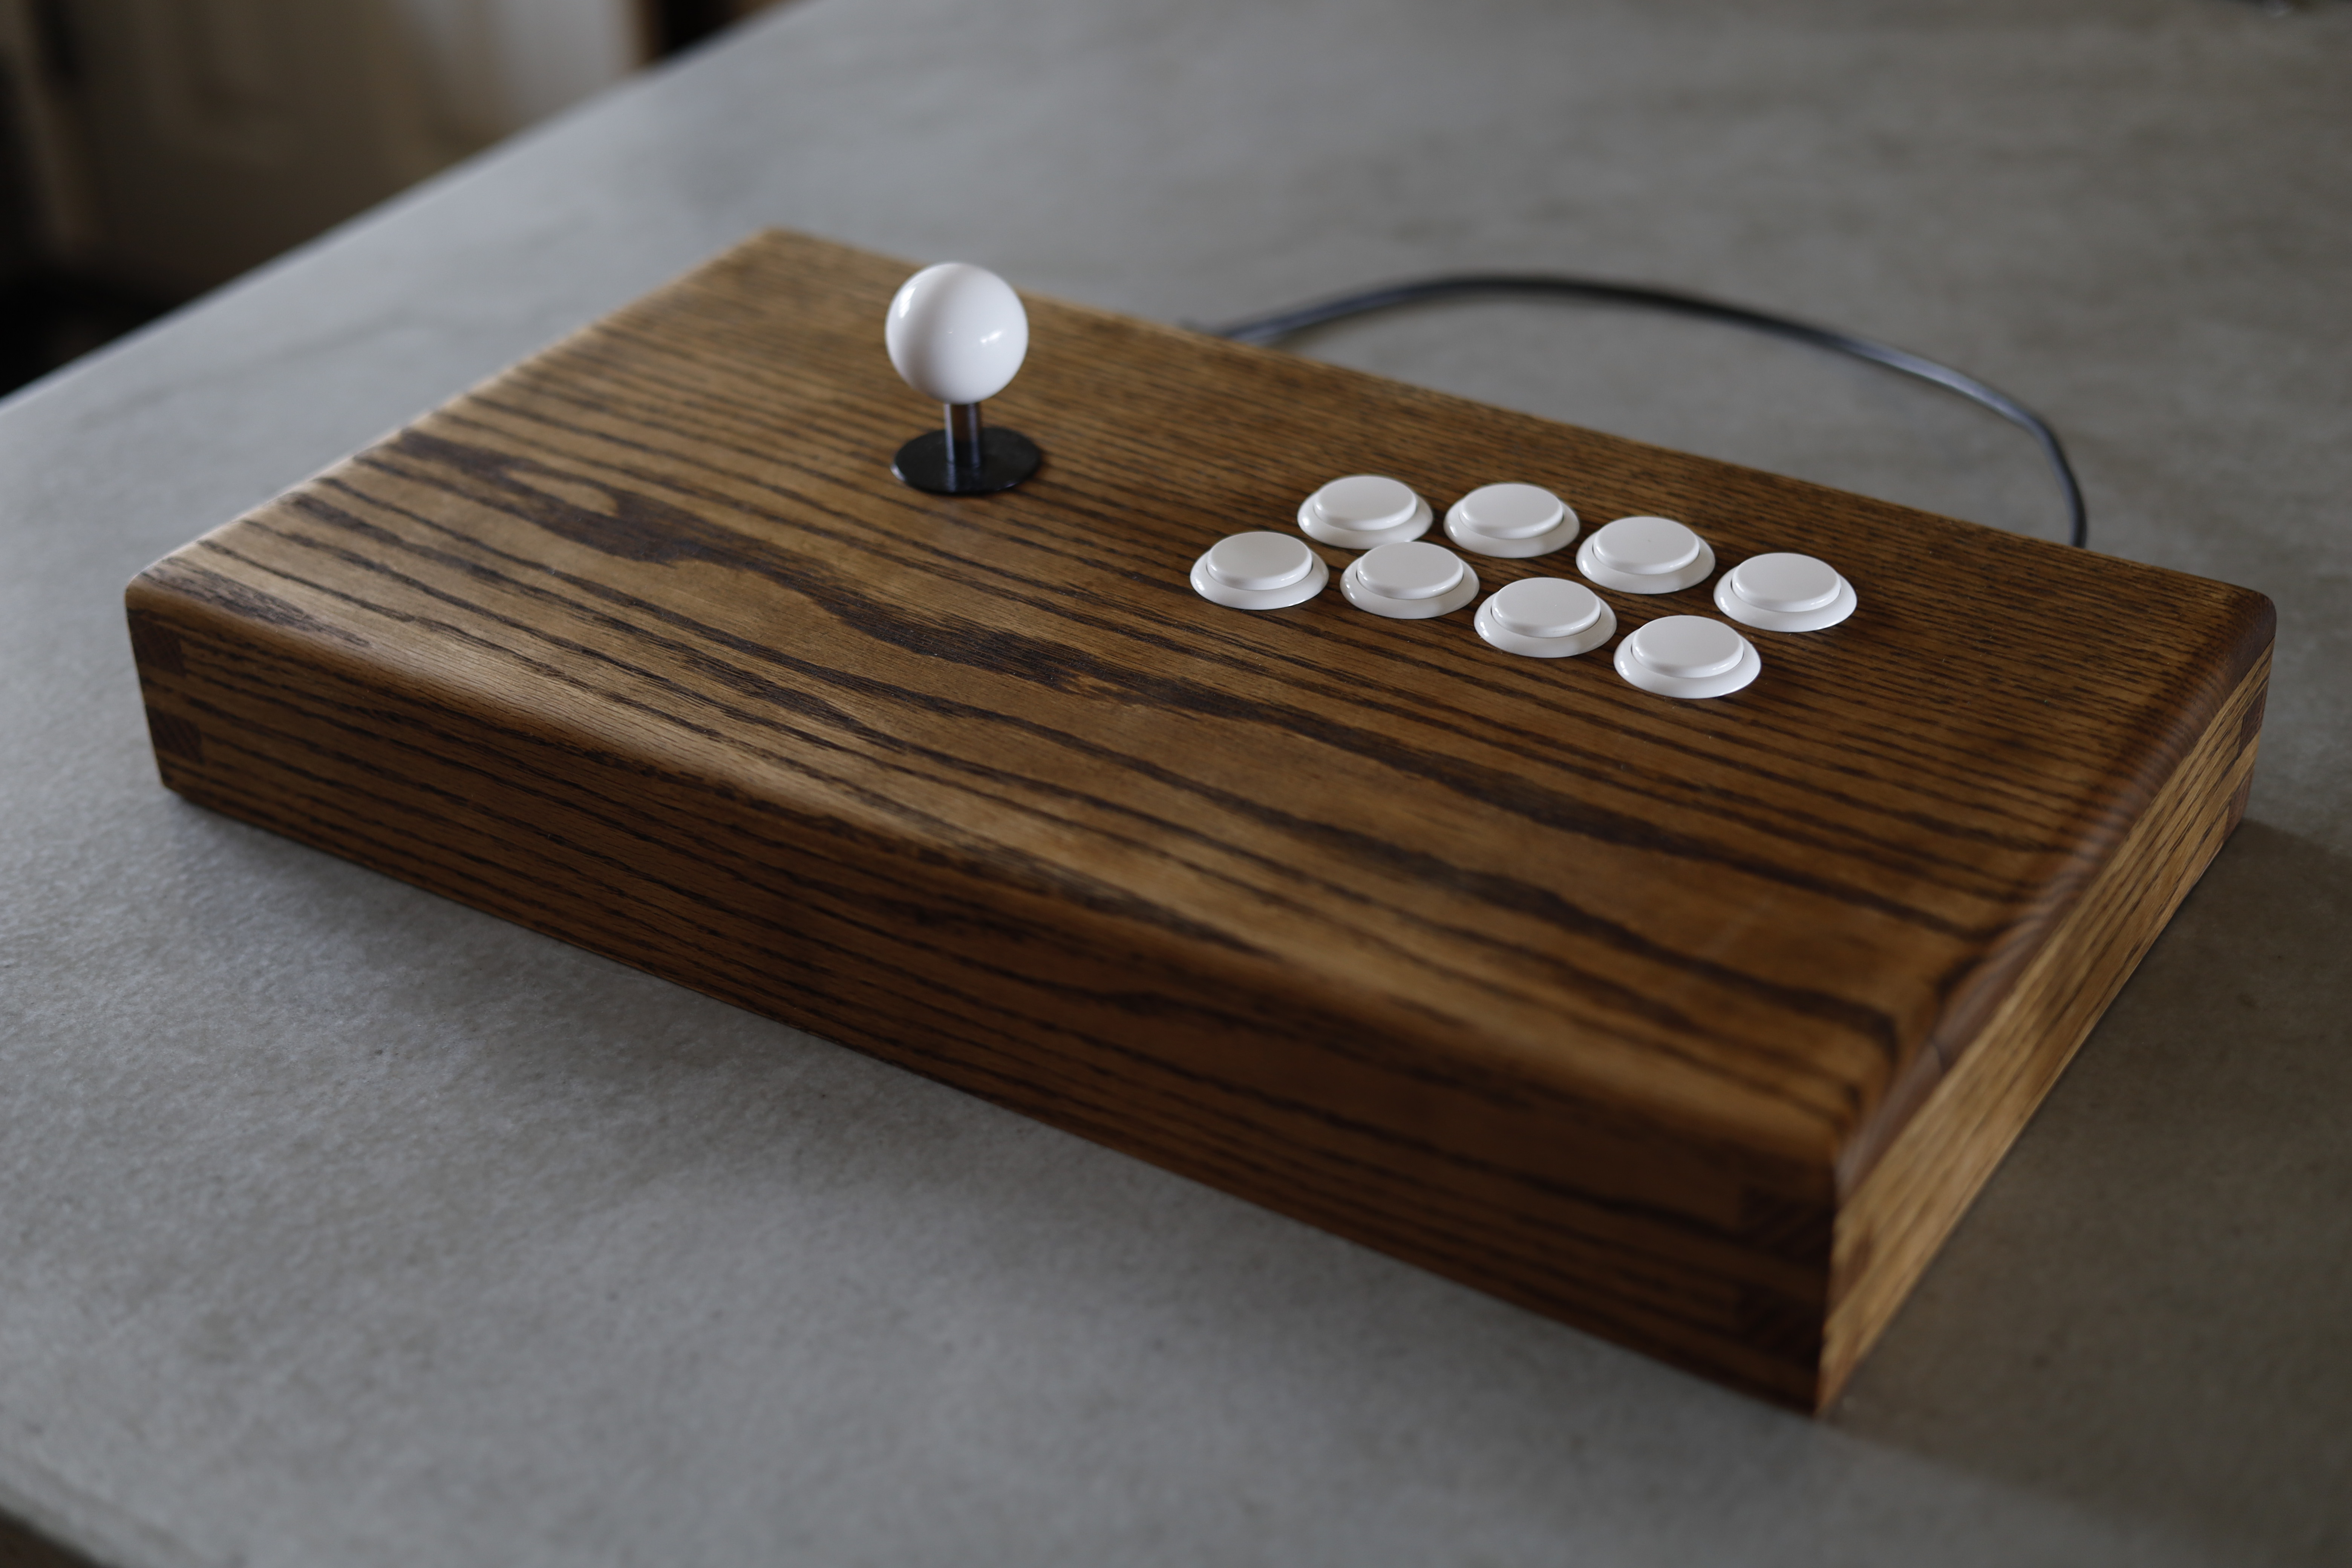
Back in late february I decided to make a wooden fight stick as a “for fun” woodworking project with the added benefit that I can use it for things such as emulation and actual fighting games. I initially intended for it to be my first blog post. Obviously it has been some months since I made this blog or posted on it but as you can see I’m finally getting to it.
The start of the project was obviously figuring out dimensions. At first I was thinking about making the dimensions 12”x8”3.5”, but after a bit more thought about I came to the conclusion that those were not ideal. After considering a few more factors such as comfort and versatility I decided to make it 18”x10”x2.5”. That made more sense to me because that way it would be shallow enough for me to put on my desk without moving my keyboard, thin enough that my hands/arms wouldn’t have to be uncomfortably raised to use it, and wide enough that my arms have room to rest on it. This was also the point at which I decided I was going to use box joints for the corners. I saw an example of one that someone else had made using box joints and really liked their clean, seamless look so that sold it for me.
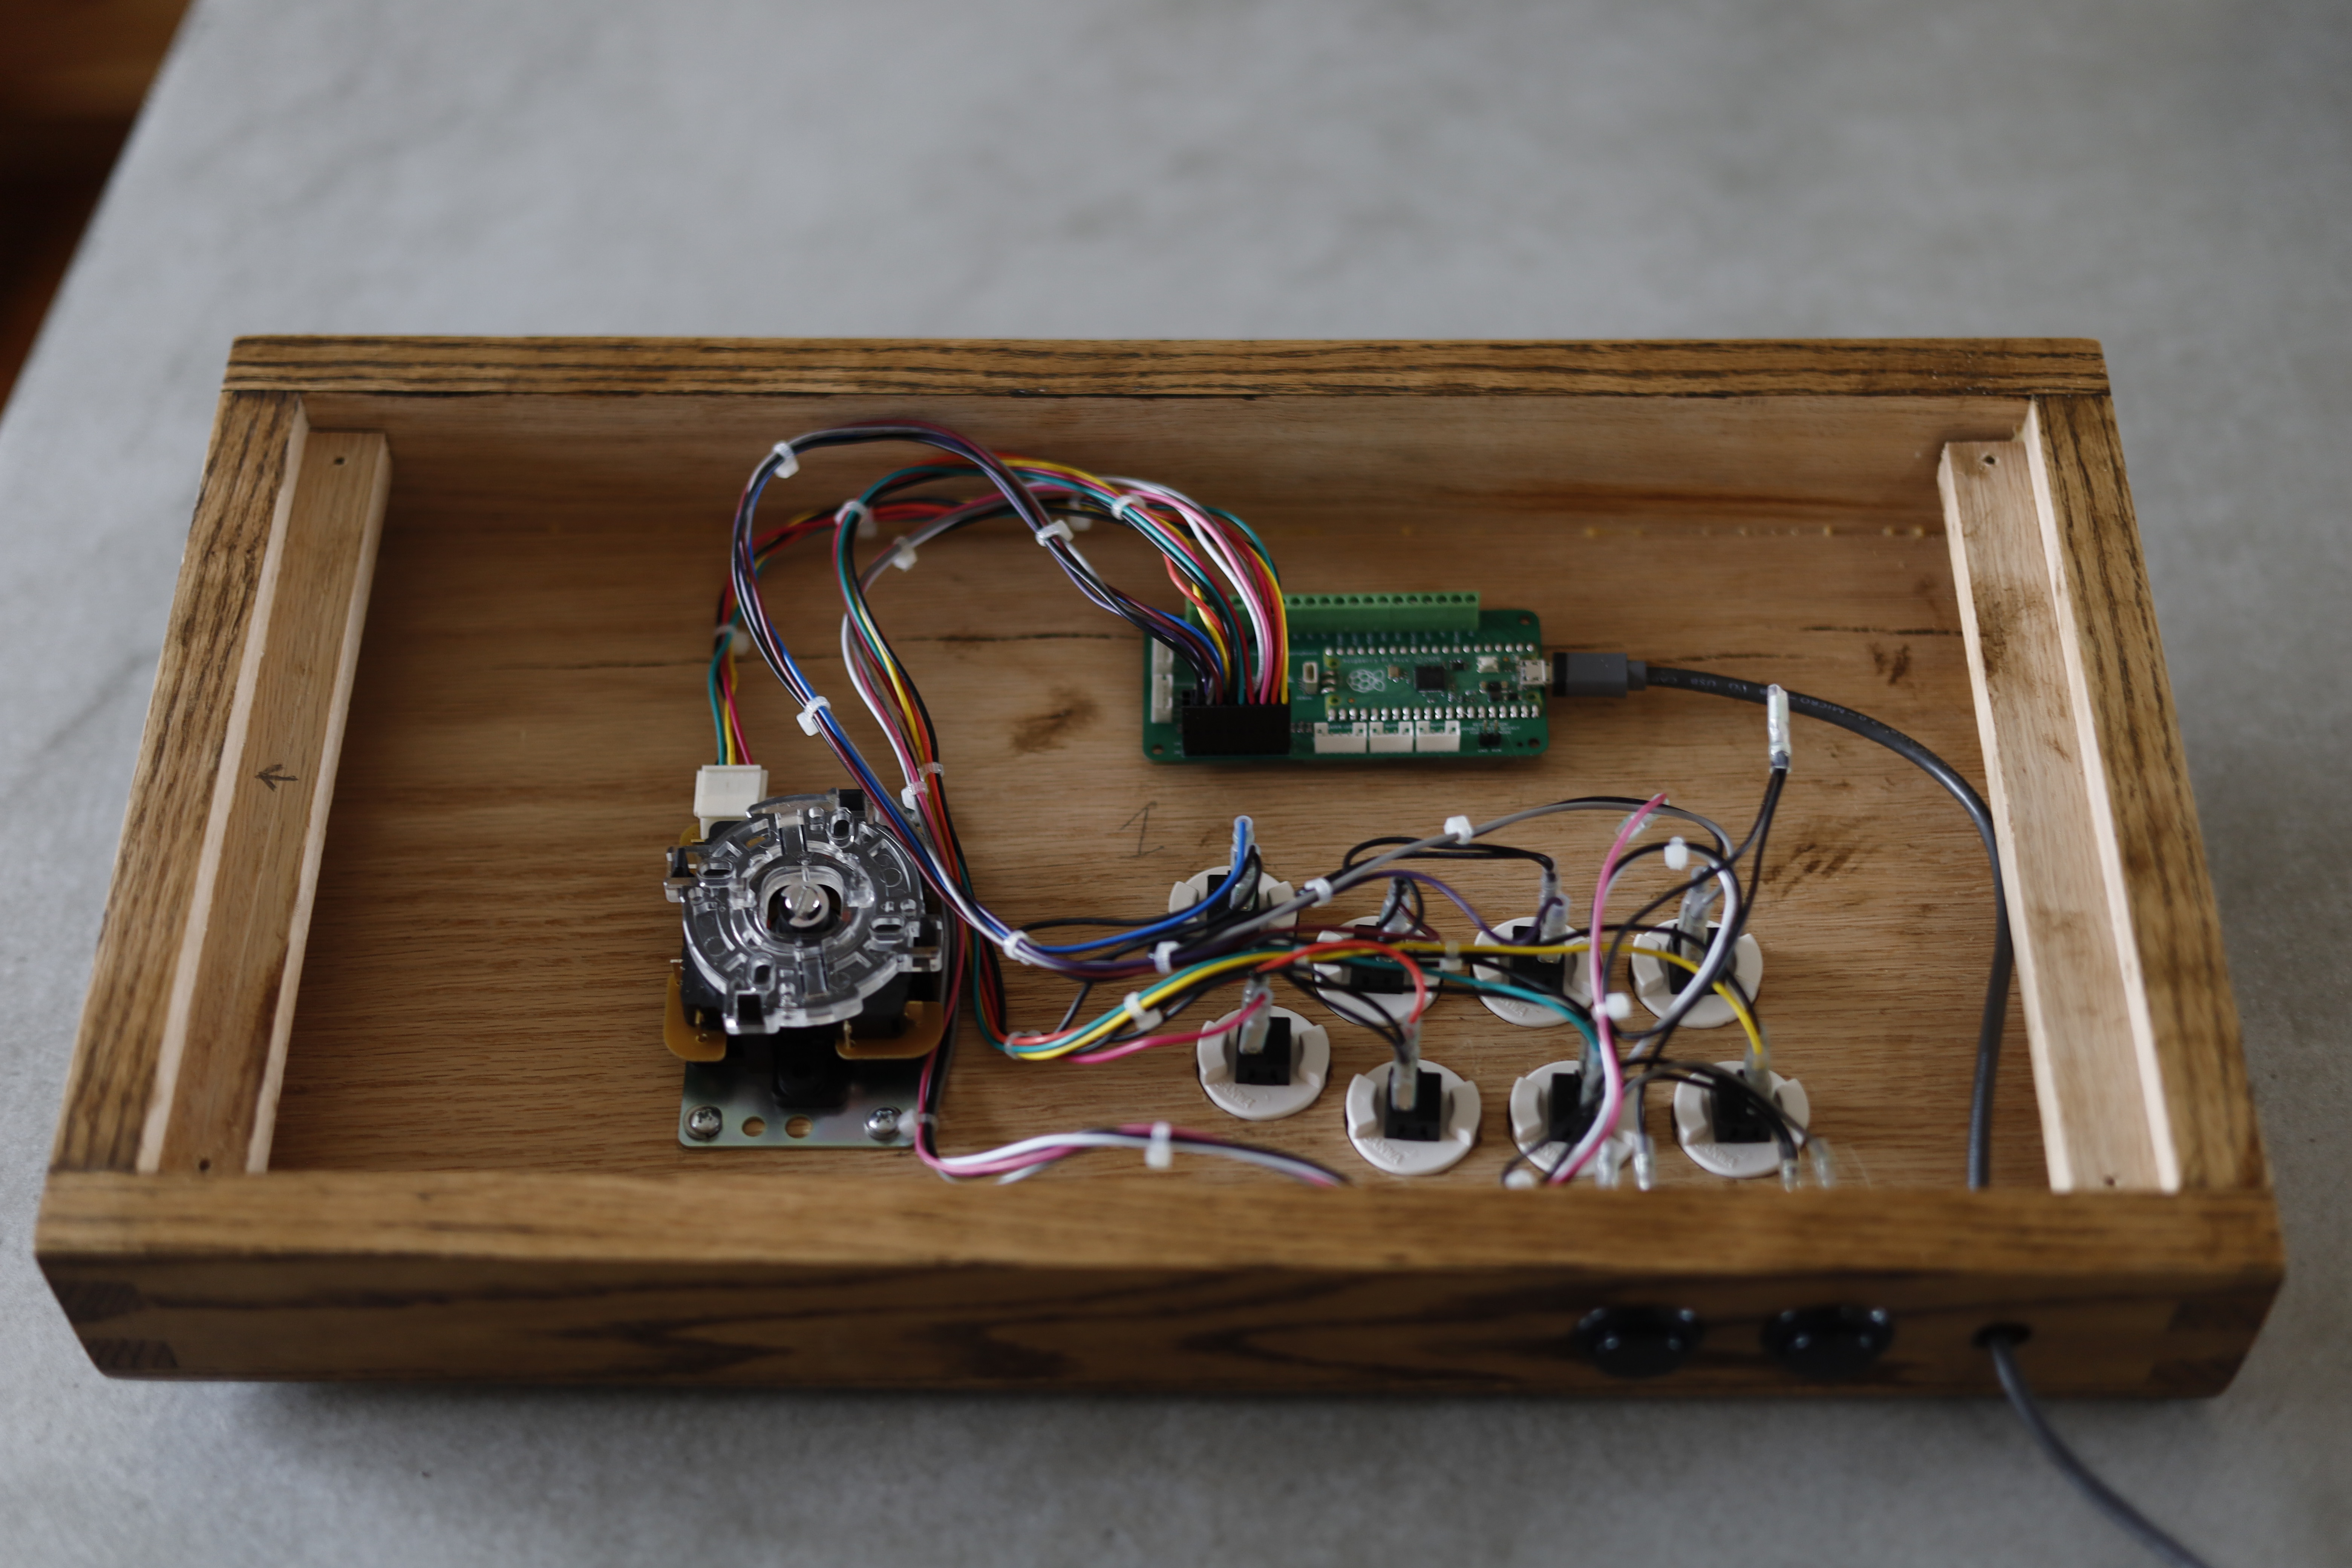
Next, it was time to figure out the internals. I put a good amount of time into researching what my best options were for price vs performance and settled on a $43 kit from Sanwa with their famous JLF joystick and 8 buttons. After ordering that, I ordered two black 24mm buttons from Paradise Arcade Shop along with a 20 pin harness to make wiring a million times easier.
The highest value item in the kit though, was the Pico Fighting Board by FeralAI. This is a $25 board that runs off of open-source firmware and a Raspberry Pi Zero. Buying open-source hardware is always the first thing I look at when looking for a PCB and the Pico Fighting Board does not disappoint. It totally knocks out all competition with its features and latency. For comparison, the Brook Universal Fighting Board is the leading mainstream PCB with 95% consistent 1.0ms latency and compatibility with pretty much every console. While the Pico doesn’t have as much compatibility, it matches the Brook board in latency and has extensive configuration capabilities in-browser via local network. I could go on and write an entire post about how awesome this thing is but I’ll leave that for another day.
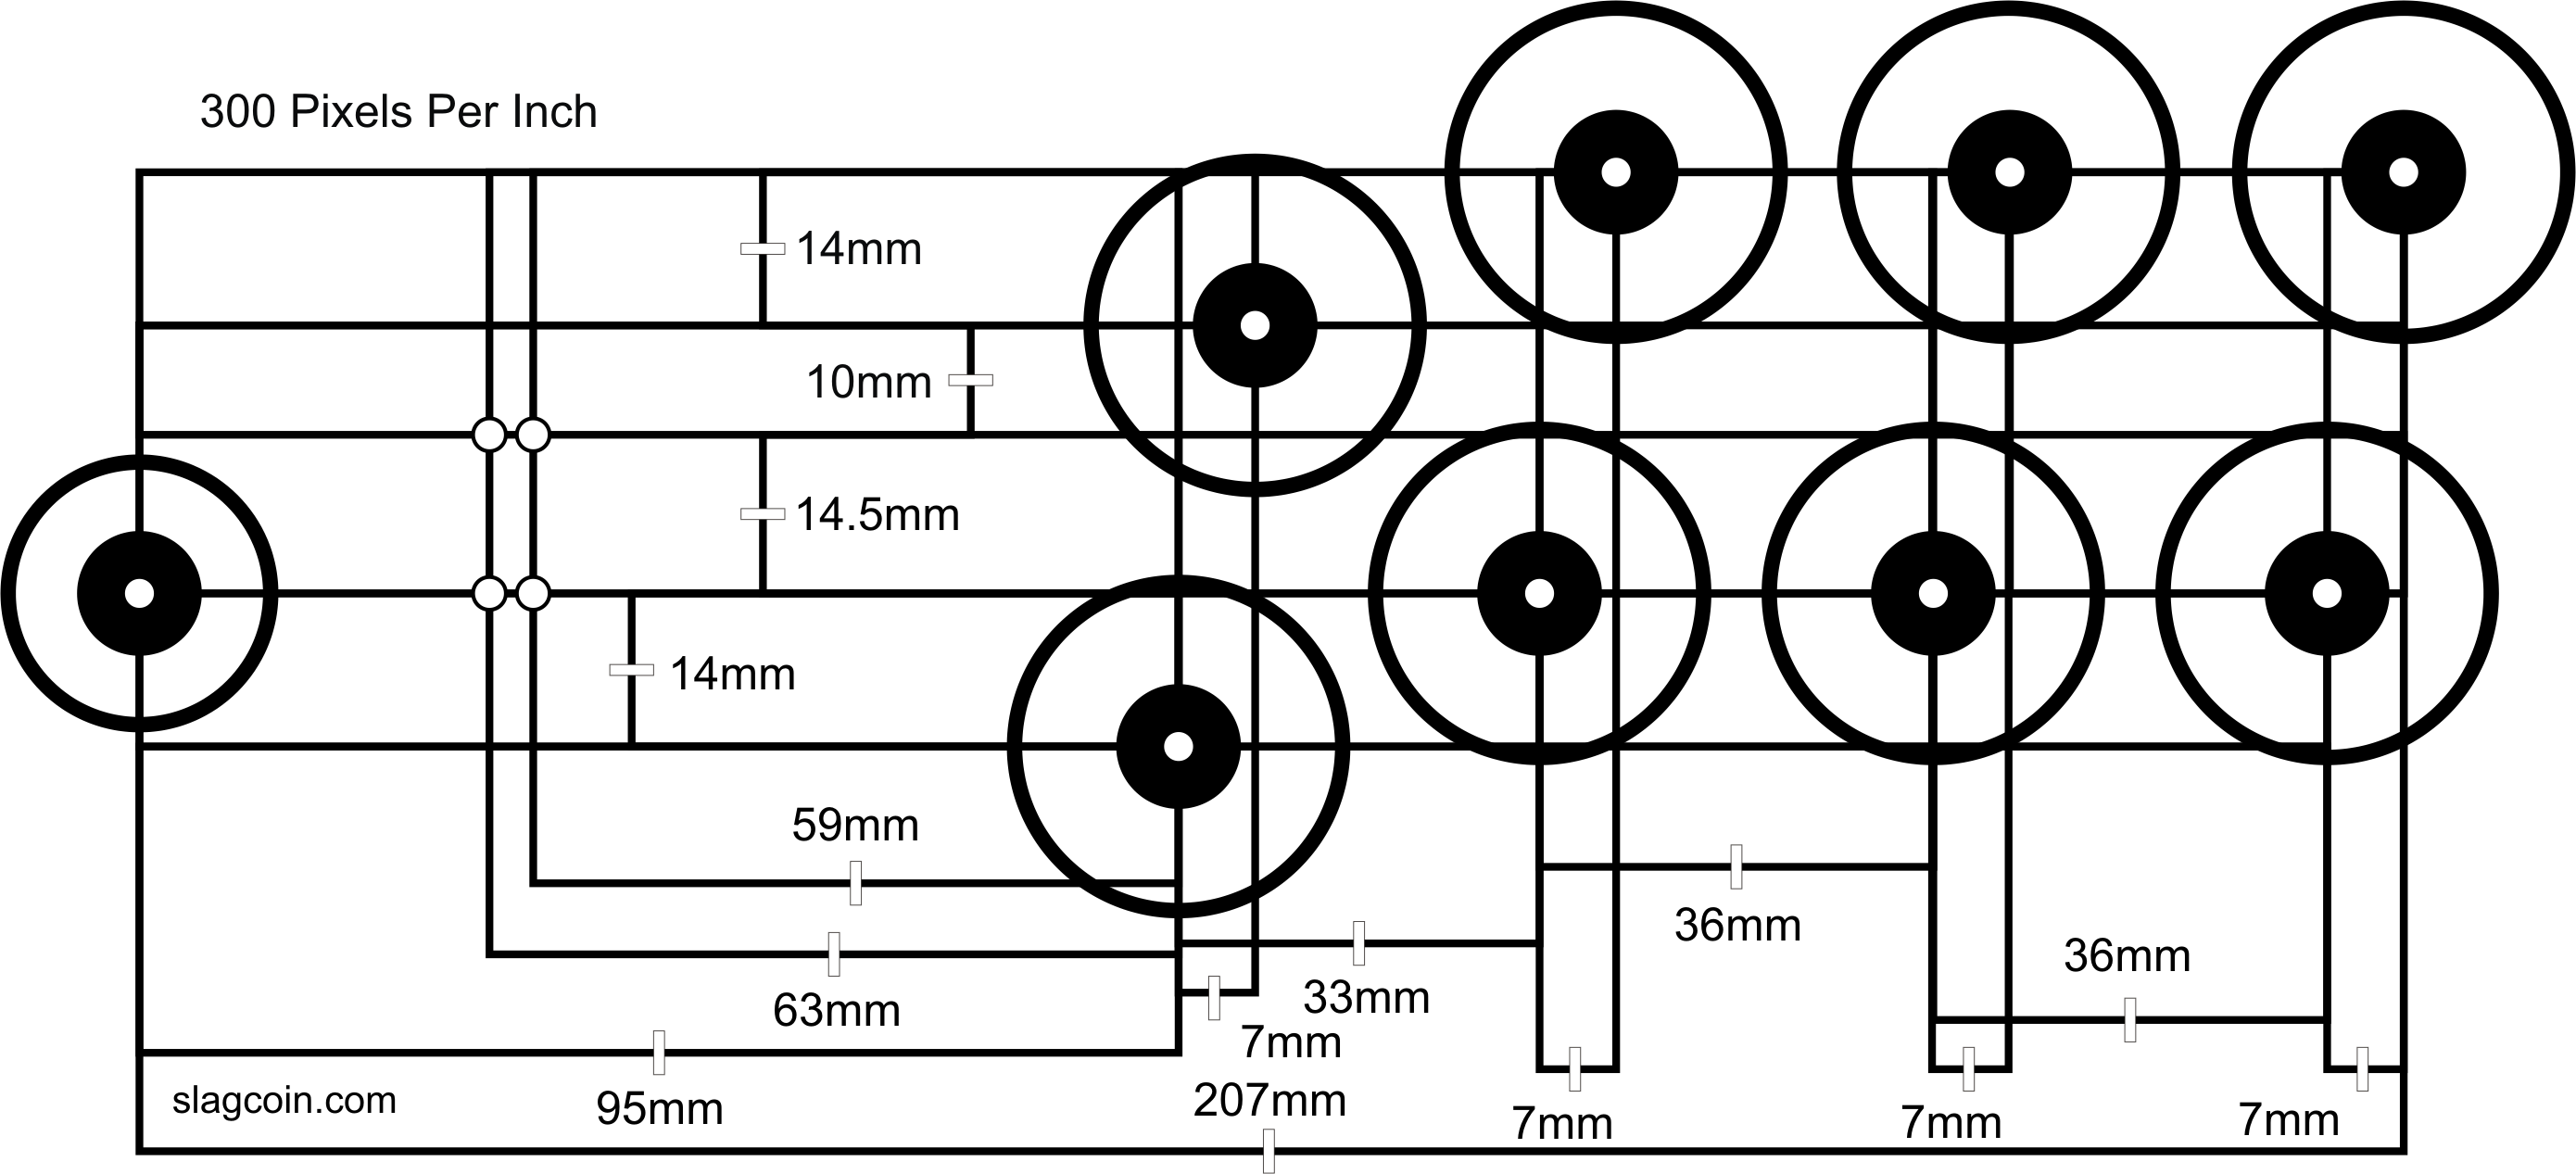 Retreived from slagcoin.com
Choosing a layout wasn’t that difficult for me. I dont think I really spent that long researching layouts but in the end they just come down to ergonomics and personal preference so picking the most popular one isn’t really a bad choice, right? The layout I chose to use is the generic Vewlix layout. I had seen some others recommending it and it looked clean and comfortable so I figured “Why not?”
Now that everything design-wise had been finalized, it was time to being construction. The process was not very difficult for the most part, just lengthy. I cut my side pieces all with 3/4” thickness and the top and bottom pieces with 1/2” to allow for a thinner body for comforts sake. Being a (nearly graduated) highschooler I have the privilege of using my school’s wood shop and with it the large CNC router that my teacher helped me to use. 30mm hole bits are quite hard to come by in the US so having access to this made the process a whole lot easier. I used a 15/16” Forstner bit in place of a 24mm bit to cut the holes for the start and select buttons, and they ended up fitting perfectly. After that it was almost time to begin glueing stuff together.
The rest of the process was pretty straightforward, the most time consuming part probably being the box joints. Setup for a table saw with a dado blade and creating the jig for consistent cuts is a lengthy process. I glued the pieces together and after a good amount of waiting, they were mostly assembled. As can be seen in the pictures, the case is two-piece, the sides and top being one and the removable bottom being the other.
With pieces assembled I began sanding. Anyone who’s made a project like this before will know that sanding is almost always the slowest part. Listening to my music made it go by quite quickly, and before I knew it I had a smooth fight stick case that was ready for some fit testing.
After putting in all of the buttons and making sure everything was nice and snug I moved on to staining. The finish didn’t take very long and conveniently my spring break started the day after so I gave it that week to make sure the stain was really soaked in and dry. After that I gave it a light clear coat to preserve it from the greases our hands have. I gave that a few days to dry and with that the case was finished.
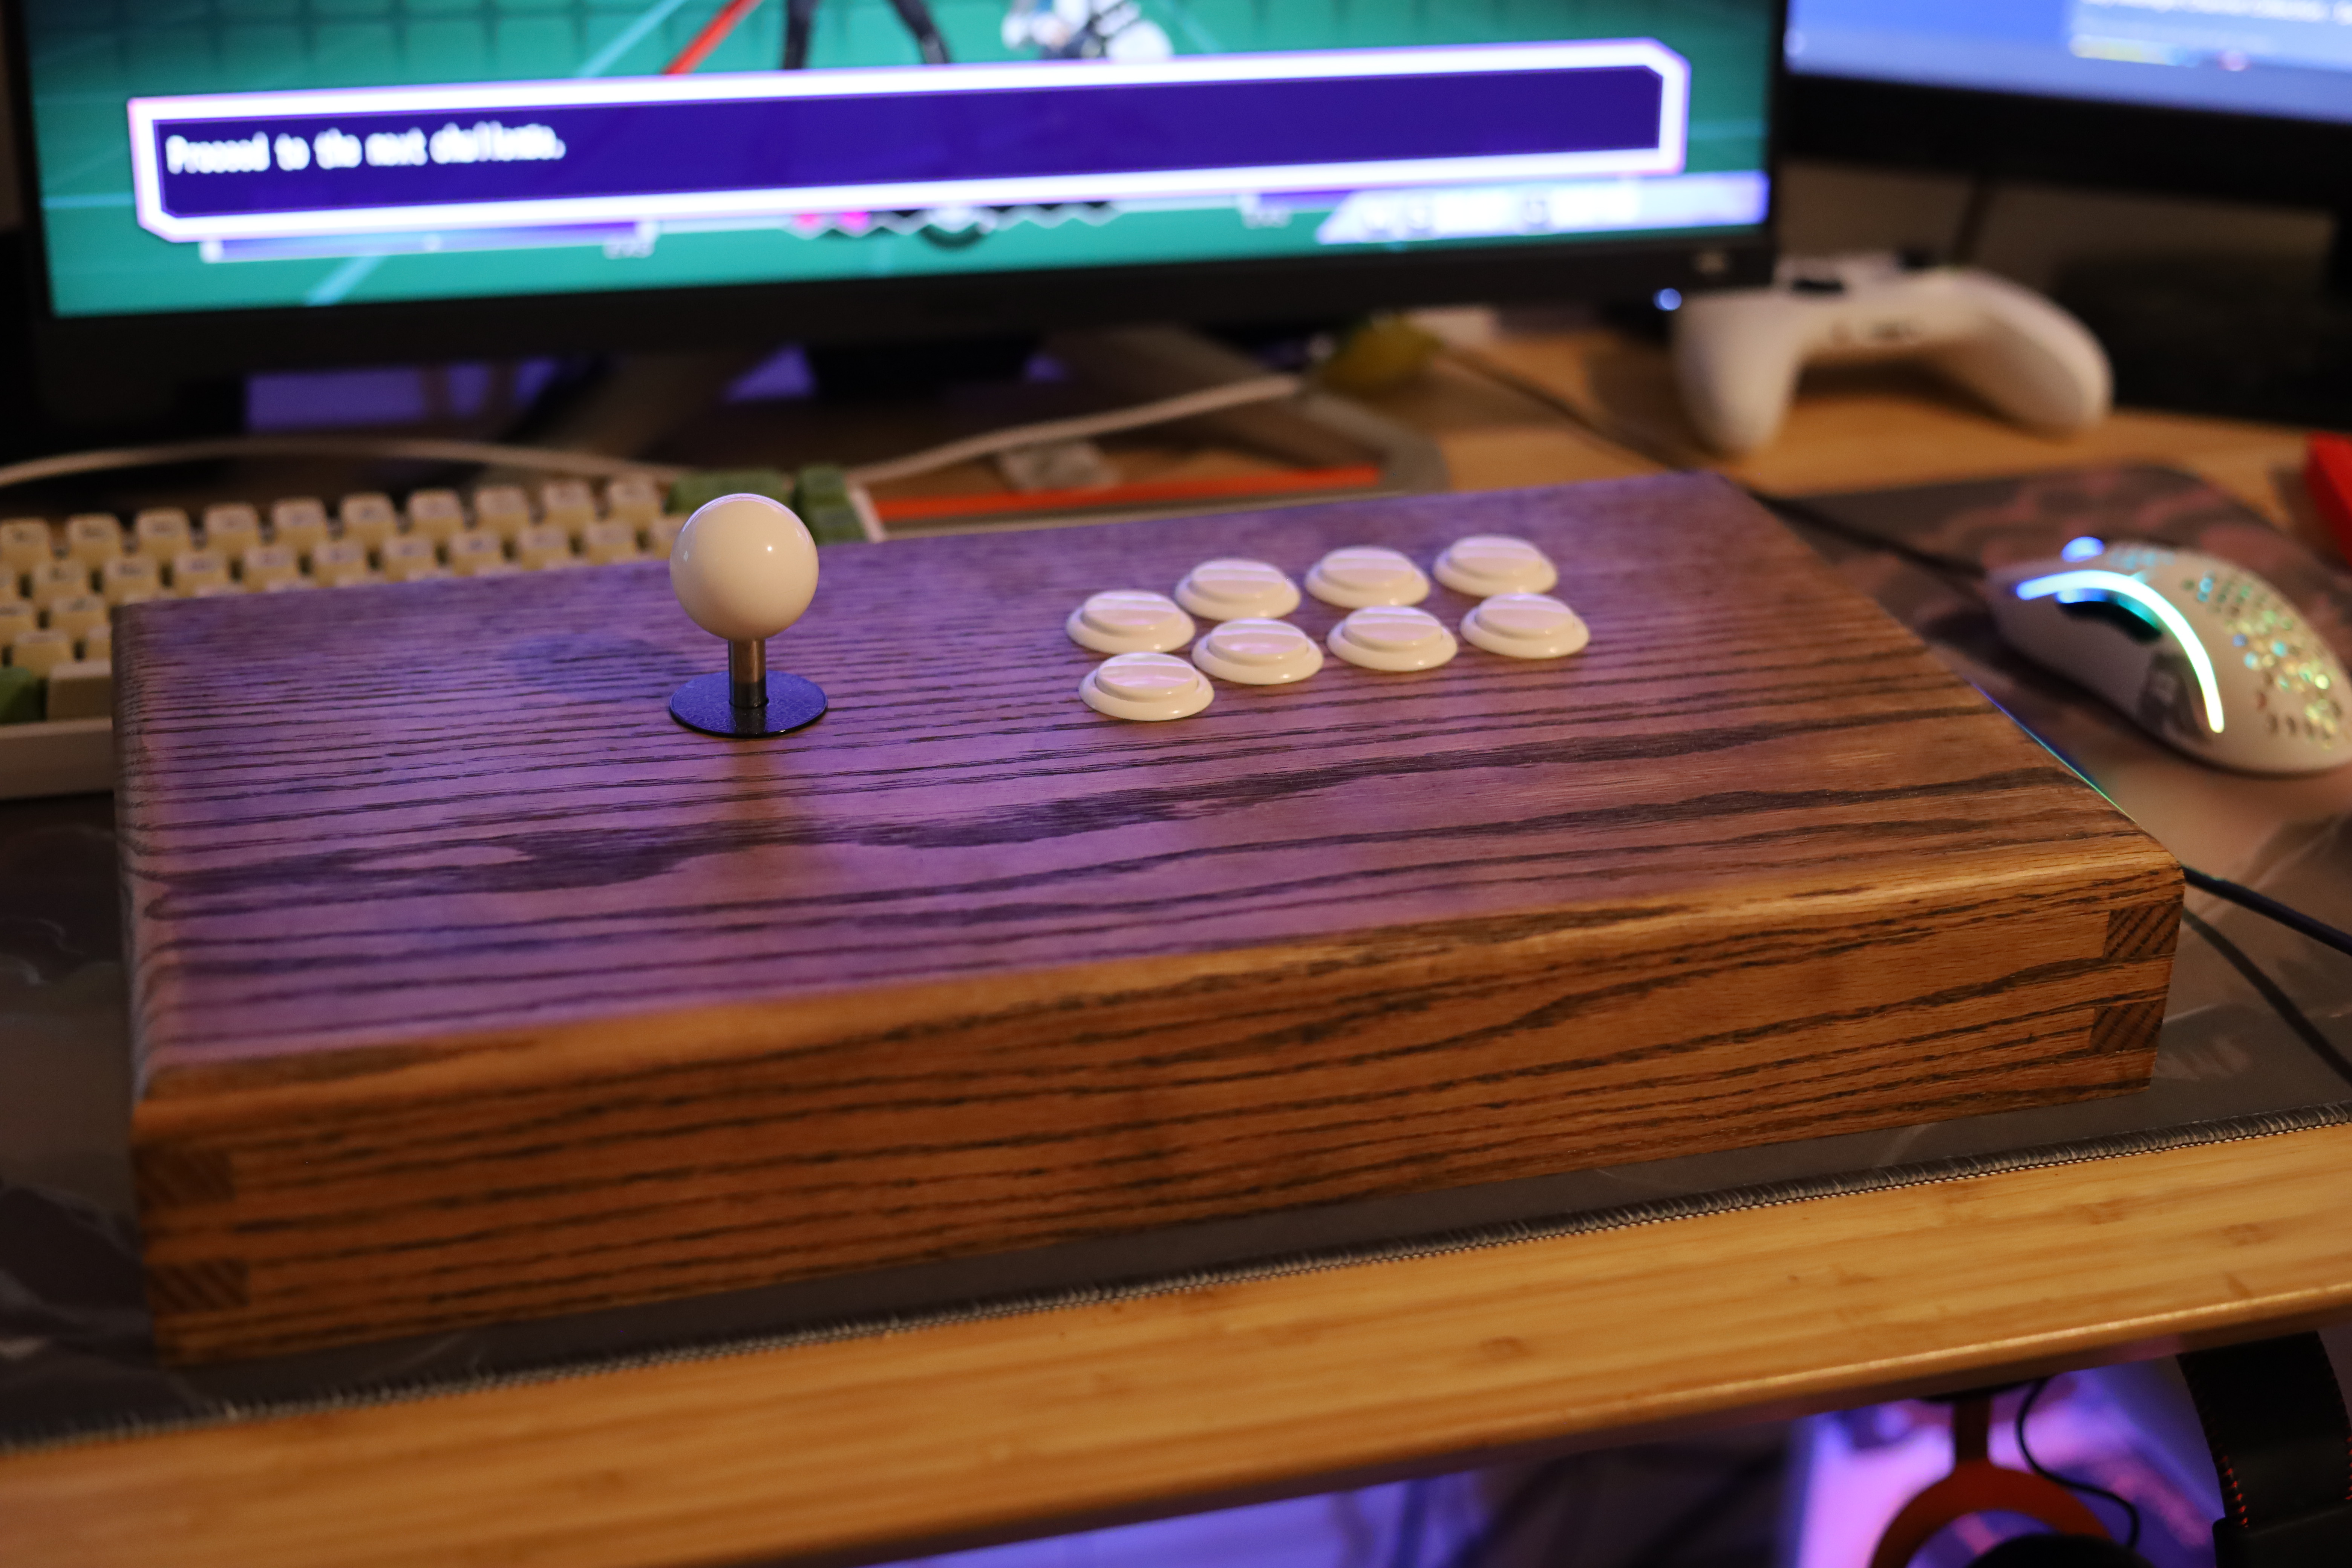
Overall it was a really fun project and a great learning opportunity. I’m extremely satisfied with how it turned out especially for the first one I’ve made. If I were to change anything it might have been the bottom, as screwing it into place is fine but I feel like I could have implemented a more elegant solution.
Before I end the post I want to give thanks to the OpenStick discord server for being great about answering any questions I had and to the ArcadeControls Forum for being the #1 resource I found for all things arcade related. Thanks for reading and have a nice day! and if you have any questions as always feel free to send me an email. :)
-
My First Real Post
My first real post probably calls for an introduction I guess. If you’re seeing this website you probably know me and know all of this already but I’ll go ahead nonetheless.
I’m David, at this time I’m 17 years old and I enjoy programming and web/server stuff as a hobby. I’m not very good at programming yet but my hope is to get better and turn it into a career. I’m also not a great writer but maybe I’ll blog a bit through here and improve my writing skills to make some more entertaining posts. Or maybe I wont.
For now I’m still working on getting this website setup and actually customized but if I do actually blog here in the future I’ll probably write about topics along the lines of keyboards, code tutorials, and handy obscure programs I’ve discovered.
Feel free to check back here occasionally for something new, and thanks for reading :)